Non-Traditional Genealogy

I’ve hummed and ha-ed about making this into a blog post because it’s just my notes so far.  It may not make a whole lot of sense to anyone but hopefully someone will get in touch who can further my thought processes or help me come up with an end result.

I’m a member of Hackerspace Adelaide so I’m already into the ‘hacker’ mind set.  ‘Hacker’ isn’t a dirty word.  Someone who breaks into people’s computers, websites etc and steals their data is known as a ‘cracker’.  You’ll see another definition of hack below.

These are my notes:

Hack – to change use of, make new from old, build, rebuild, modify, to give added features, make it do something it was never intended to do

Genealogy – data, facts and figures, photos, documents, stories, people, audio, video

Traditional genealogy – produce a family tree, charts, a book, maps, tree on a website, give talks, write articles

What can I produce from the large amount of data I’m generating?

– mashups
– visualisations
– interactive maps
– physical interactive things
– virtual interactive things

This whole thing is about bringing data to life for an audience and for me too!!

What data can be drawn from a .gedcom file other than a family tree?

.gedcom is a text file therefore much data can be pulled from it.

How do you take data from a .gedcom file to create something other than a family tree?

This is the big question here at the bottom, how can I take data from a .gedcom file to create a visualisation or a mashup or any of the other things I’ve listed.  I have a couple of people I can pose this question to but I wanted to put it on my blog to see if I get any other responses and to see if anyone else is doing similar work.


Some explanatory links:

Technology Hacker

http://en.wikipedia.org/wiki/Hacker

Gedcom

http://en.wikipedia.org/wiki/GEDCOM

Genealogy Research On The Web Utilizing Organised Guidelines – A senior research paper by Anna Sterling.

http://www2.stetson.edu/mathcs/people/students/research/pdf/2010/asterling/proposal.pdf

Youtube Subtitles Suck But There Is A Solution

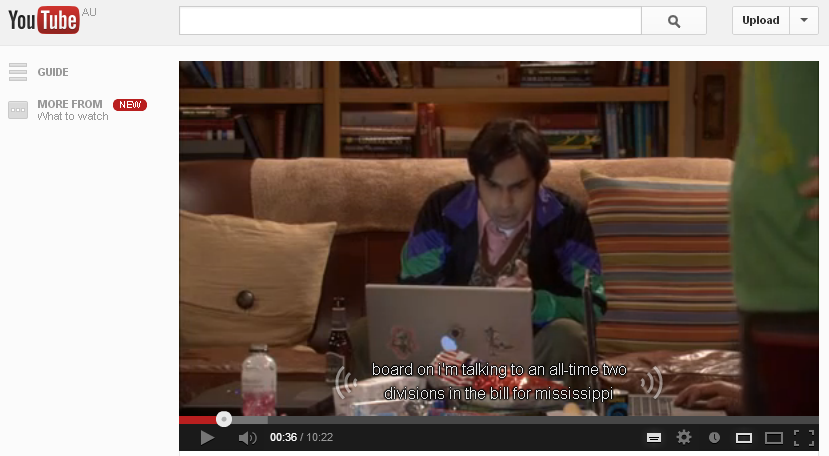
If you make any videos for online please consider people who are deaf or hearing impaired and put subtitles in your video.  If you’re uploading your video to Youtube please don’t rely on the youtube subtitles.  They really, really suck.

Here are some examples;


Bad subtitles on youtube video

Bad subtitling


Bad youtube subtitles

Bad Subtitling


Bad youtube subtitles
Bad Subtitling


Amara.org

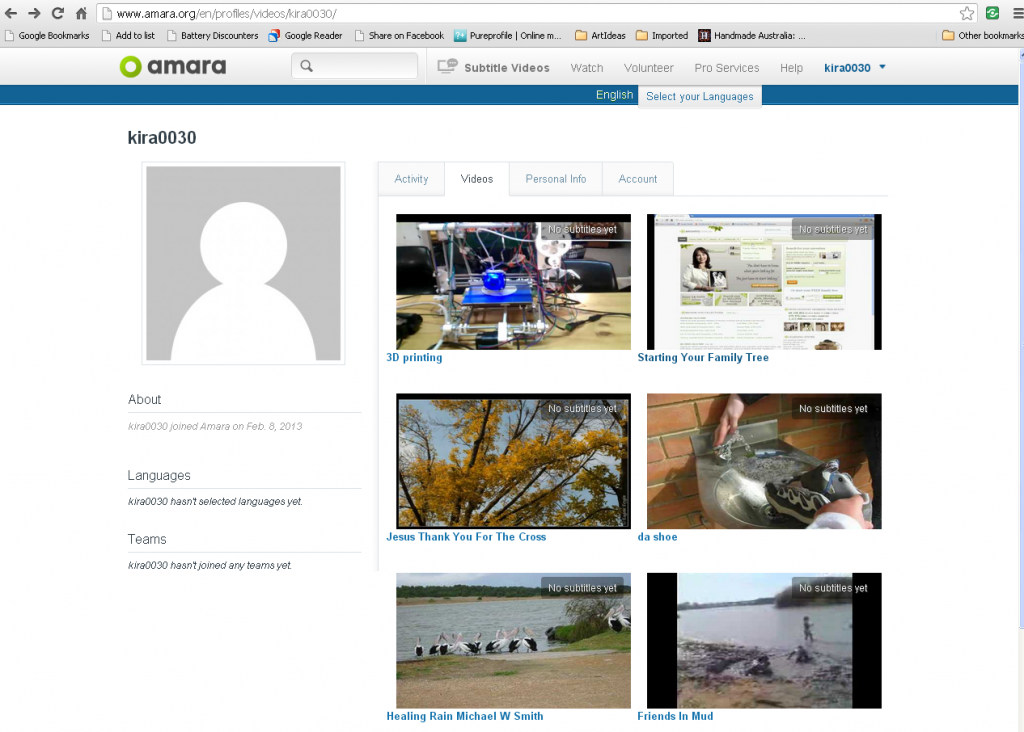
If you have a youtube channel you can create an Amara.org account and link your channel to it.  Amara volunteers will subtitle your videos for you or you can do them yourself using their easy subtitling interface, Universal Subtitles, for free.

Connect your Youtube channel with your Amara account

My Youtube channel connected to my Amara account


It took me about 15 minutes to subtitle one of my videos.  Here it is http://www.amara.org/en/videos/9eZi5is4dsZH/info/jesus-thank-you-for-the-cross/

There are also share buttons for Facebook and Twitter and an email button so that you can quickly and easily share your videos with your social networks.  You can also get an embed code to embed your videos in your blog or web page.

Even if you don’t make videos or have a Youtube account you can still make subtitles for other people’s videos by joining a team at www.amara.org

Please consider subtitling your videos so that myself and others can utilise them to the full.  Thanks 🙂

GEDCOM X A New Standard?

GEDCOM X.

The GEDCOM X project is FamilySearch‘s offering to the community of a set of free and open specifications, libraries, and tools defining how genealogical data can be stored, shared, searched, and secured across all phases of the genealogical research process.

This is a new and exciting development in the genealogical community.  At present it is difficult to export and import a .gedcom file from one program to another without some data loss and errors, hopefully .gedcomx will be able to address these and other issues.

I will be excitedly following the project and hope to be able to contribute to it a little as well.


.gedcomx model

.gedcomx model

If you scroll about half way down this page https://github.com/FamilySearch/gedcomx/wiki there is more explanation of what the .gedcomx will cover.

The intent of GEDCOM X is to define a standard for modeling and exchanging the components of the research process that comprise the genealogical proof standard:

  • Search Reliable Sources
  • Cite Each Source
  • Analyze Sources, Information, and Evidence
  • Resolve Conflicts
  • Make a Soundly-Reasoned Conclusion


Features Of PHPGedView

In my previous post I talked about how to install PHPGedView and now I want to tell you about my favourite features in this software.

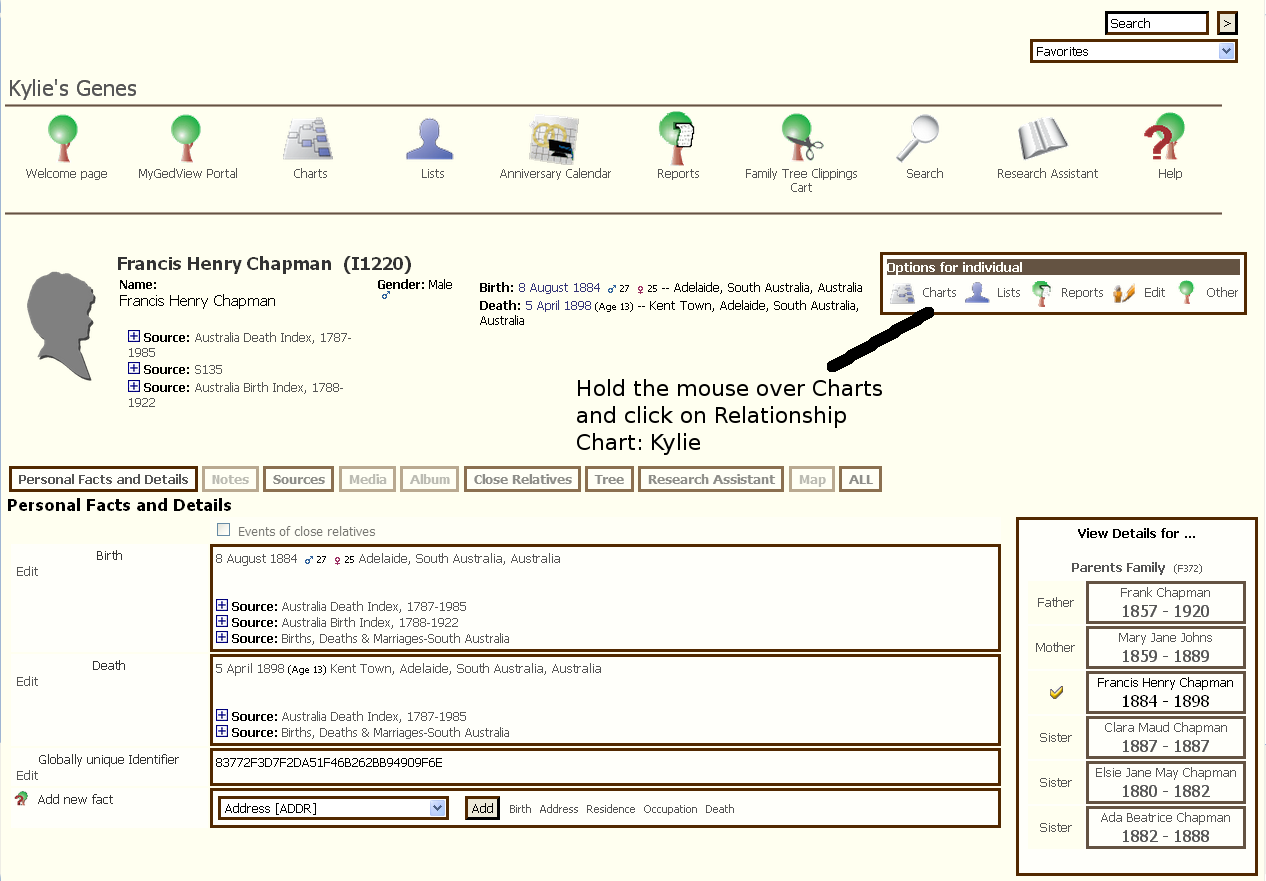
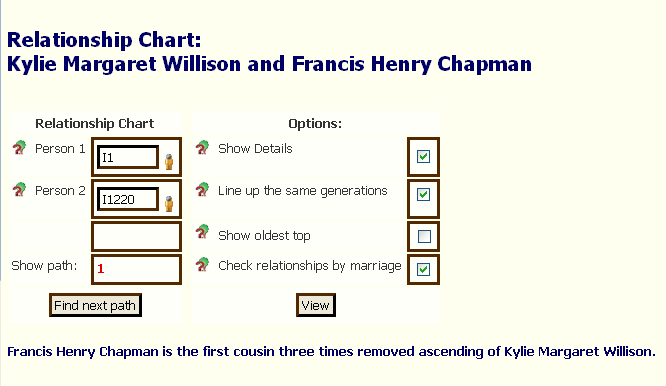
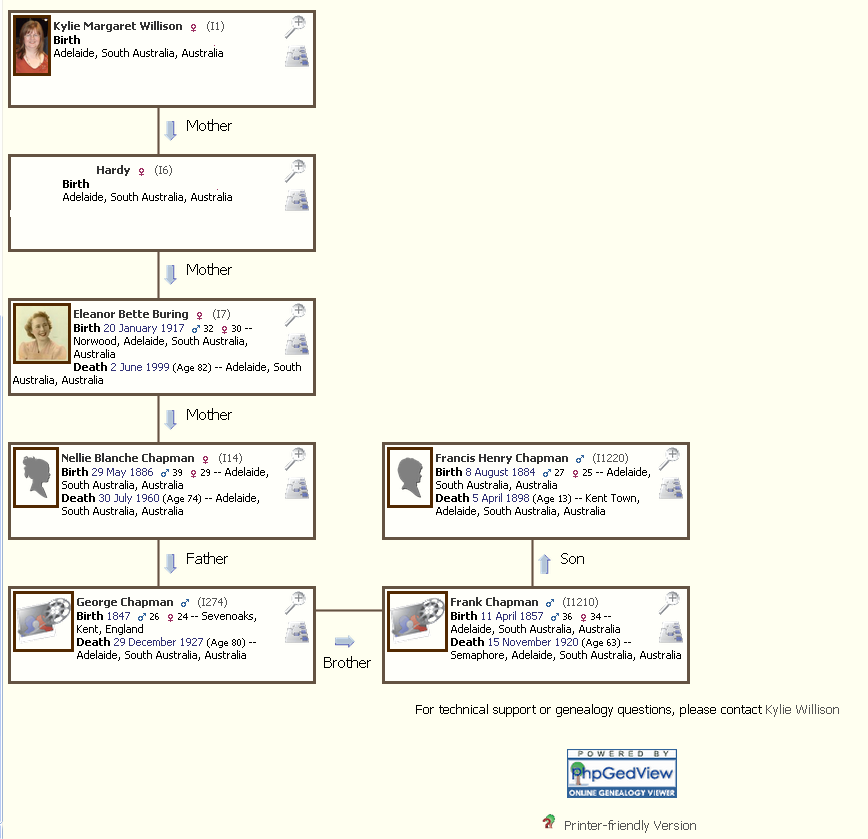
One of the most common questions I am asked, when someone contacts me via my website, is how are you related to the person I am researching.  Using PHPGedView I can quickly bring up a chart which shows the relationship between me and another person in my tree.  Here is an example:

How am I related to Francis Henry Chapman?  I look up Francis Henry Chapman.  This is his profile page below.

Features of PHPGedView

Features of PHPGedView

Features of PHPGedView

Features of PHPGedView

This is the welcome page.  It is very customisable.  I have chosen the background and border colours and the blocks of content which I want to have on here.  There are many you can choose from – GEDCOM Statistics, Welcome, GEDCOM News, TO DO List, Charts, HTML and Advanced HTML, Favourites, and Logged In Users.


Features of PHPGedView

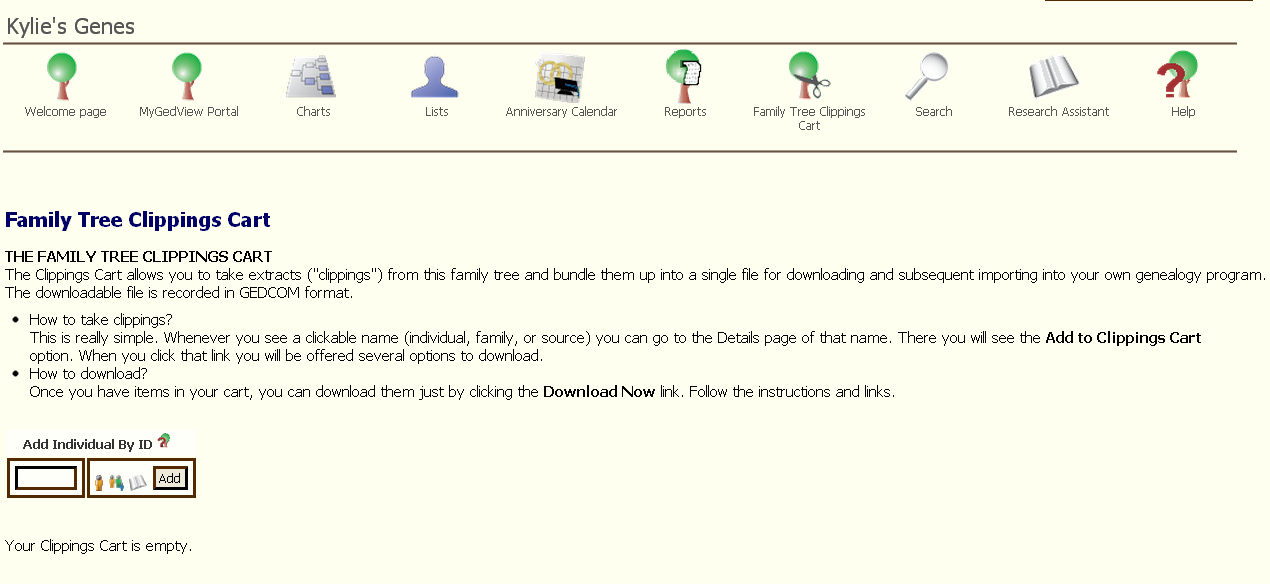
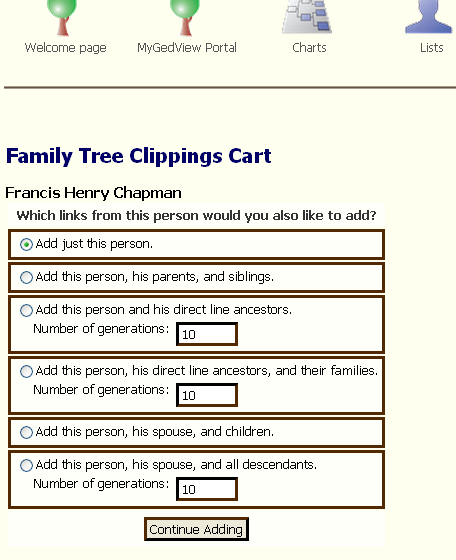
If I want to share part of my tree with someone who has contacted me then I can clip the part of my tree that I want to share and send it to them as a .gedcom file.  Using Francis Henry Chapman as an example again;

Features of PHPGedView

I chose the second box from the top – Add this person, his parents and siblings.

Features of PHPGedView

I want a .gedcom file so I leave the first option set to .gedcom.  A .zip file will be smaller to download so yes I want it zipped and with the media files included.  There is no need for privacy settings on this file because all the people included are deceased and because I’ve chosen who I am giving it to.  If there was anyone in the list that I didn’t want in the file I can remove them now by clicking the x on the right hand side next to their name.  All the sources, repositories, and media are included.  Now that I have everything set as I want it I can click the Download Now button and email the generated file to my contact.

For me using PHPGedView means I can collaborate on my tree with my sister, maintain ownership of the data and photos, I can set up tasks and assign them to the members who are collaborating with me or just keep the list for myself as a reminder of things to do in the Research Assistant section of the software.

These are just some of the features I enjoy using with PHPGedView.  Would you consider using PHPGedView for your online family tree?

Stay tuned for my next post which is called Connecting Cousins.

Installing PHPGedView For Your Online Family Tree

Following on from my previous posts of the benefits of having your own website and blog this is a post about installing PHPGedView on your website for your family tree.  This is the software I use for my tree.

PhpGedView logo


PhpGedView is a revolutionary genealogy program which allows you to view and edit your genealogy on your website. PhpGedView has full editing capabilities, full privacy functions, can import from GEDCOM files, and supports multimedia like photos and document images. PhpGedView also simplifies the process of collaborating with others working on your family tree. Your latest genealogy information is always on your website and available for others to see.

PHPGedView is what is known as Free and Open Source software it is free as in cost as well as free as in freedom.

To install PHPGedView on a website hosted by DreamHost I use their One Click Installer.  This is the same method which I used to install WordPress which was demonstrated in a previous post.  If you already have a web hosting account with DreamHost and have registered a domain then this is the method to use to install PHPGedView.  You cannot install it in the same place that you installed WordPress or any other software.  If you already have other files or software installed on your website you will need to make a new directory to install PHPGedView into.

*Please note* I do receive a cash payment from DreamHost if you sign up using the above link.

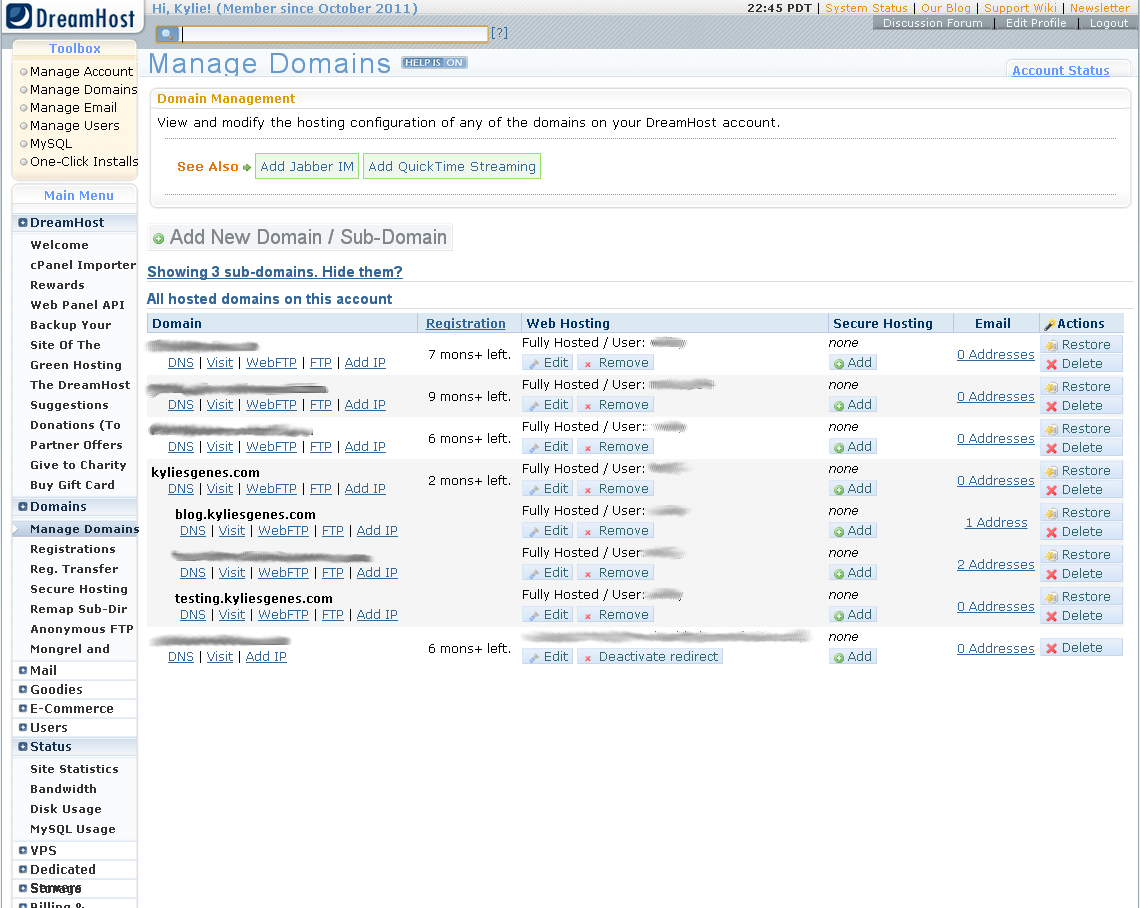
Sign in to your DreamHost Web Panel

screenshot of DreamHost administration panel

Screenshot of DreamHost  Web Panel

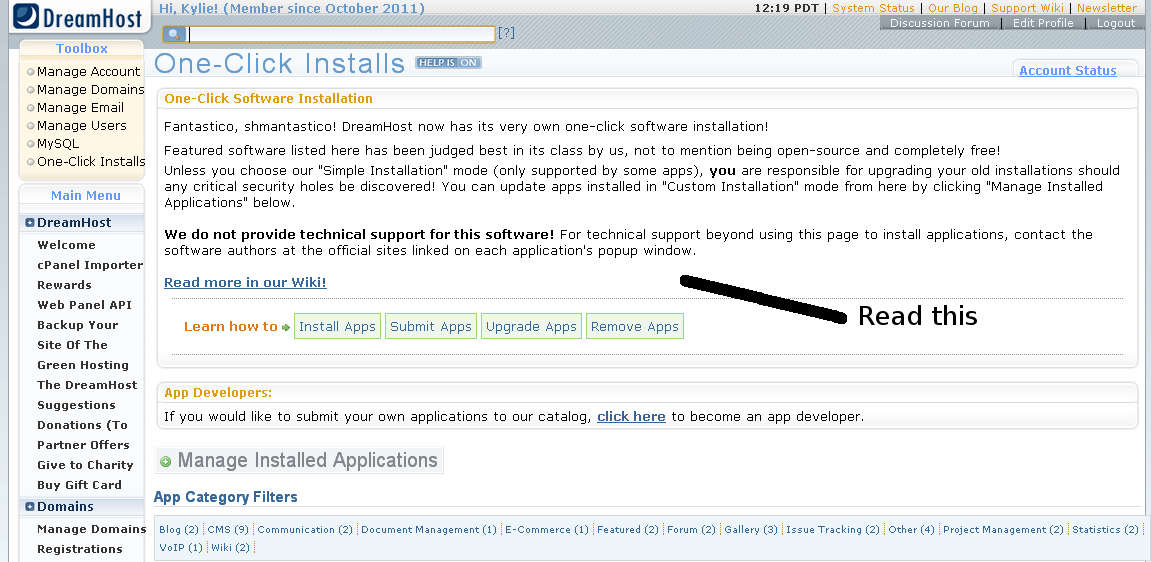
In the top left hand corner of your Web Panel, in the Toolbox, click on One Click Installs.

Installing PHPGedView

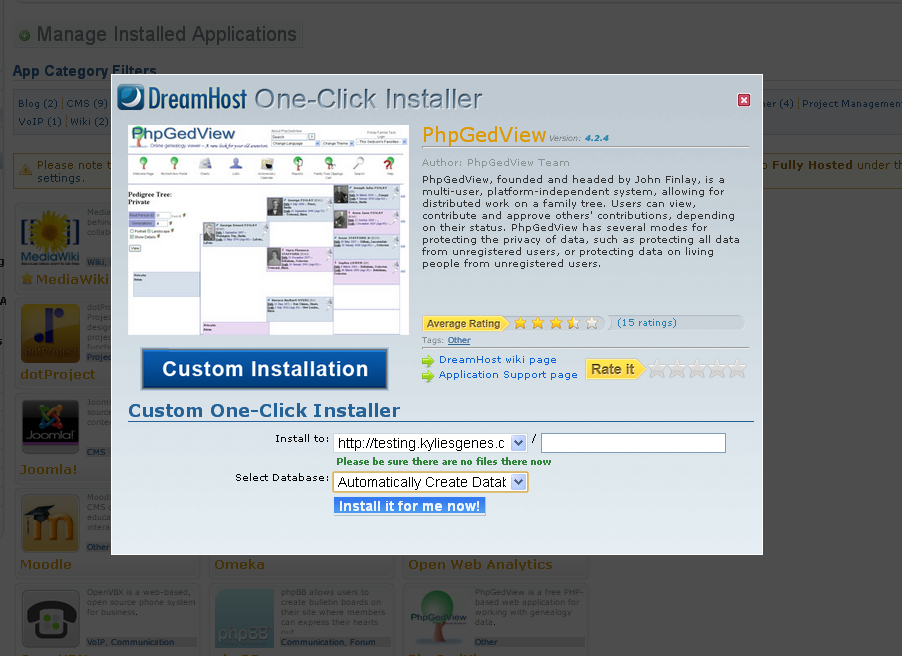
In the list of applications click PHPGedView and then click Custom Installation.

Installing PHPGedView

Choose where you want your installation to be and then click Install it for me now!  This is where you need to make a new directory to install PHPGedView into if you already have other files or software installed on your website.  For example I installed PHPGedView into a testing sub domain I had previously created and in its own directory.  E.G.  http://testing.kyliesgenes.com/PHPGedView

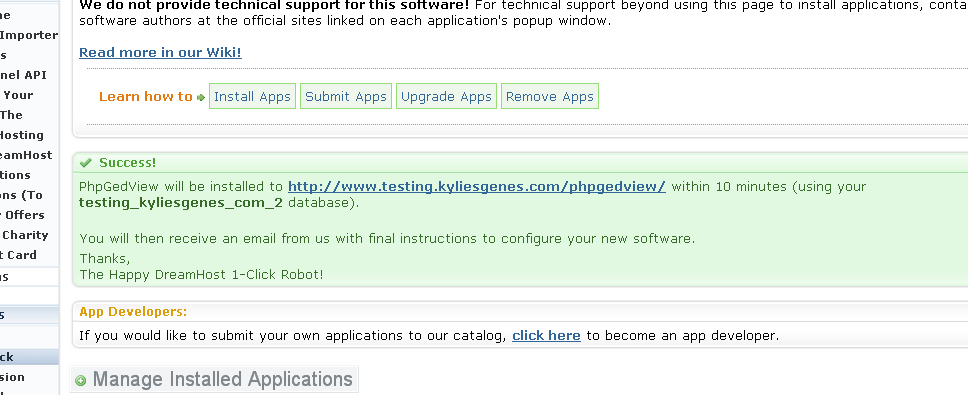
Installing phpgedview

Note the section in green above – PHPGedView is being installed and you will receive an email with final instructions on how to configure the software.  All the best with using PHPGedView.  Please leave me a comment if you do use these instructions to do this installation, I’d love to know.

If you already have your own website with your tree on it what software do you use?  Have you been inspired through this series of posts to create your own website and put your blog or family tree on it?

My next post will cover the features of PHPGedView which I like and use!

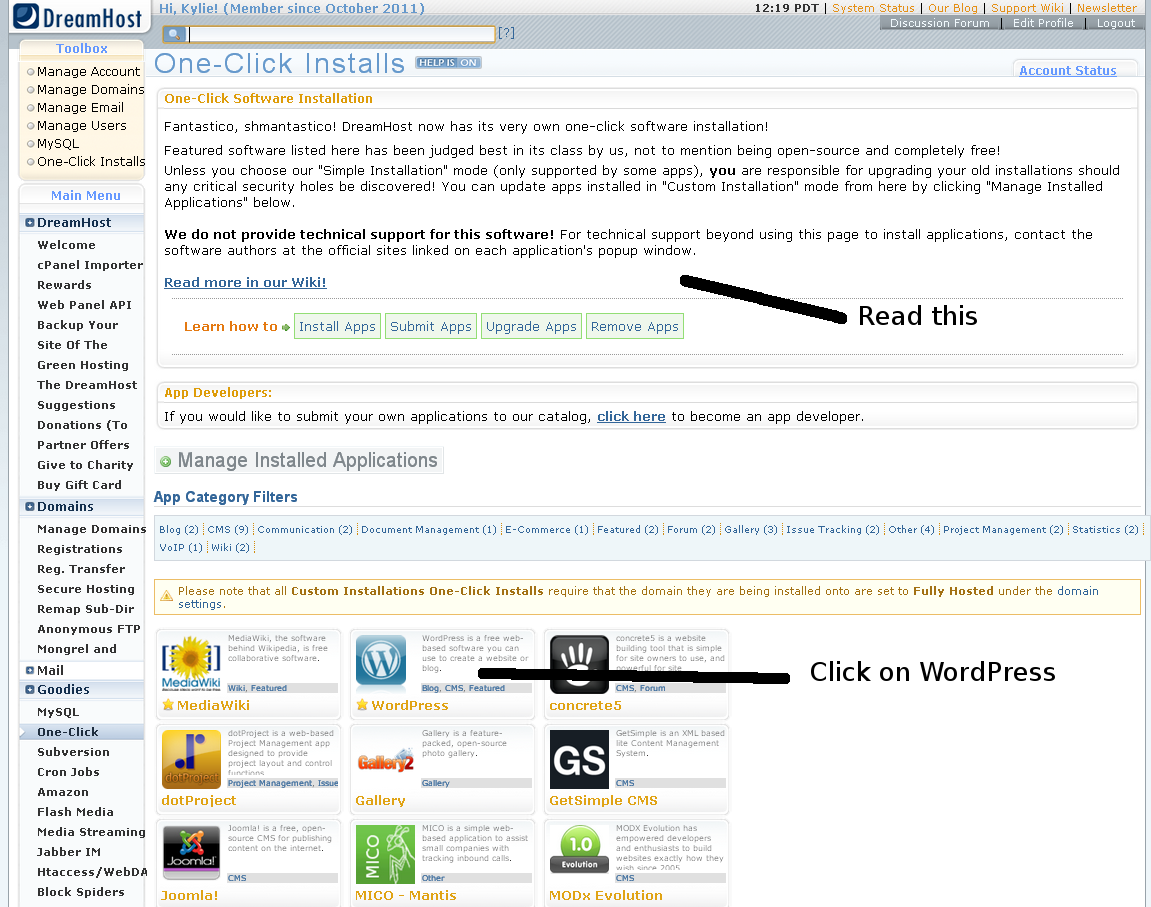
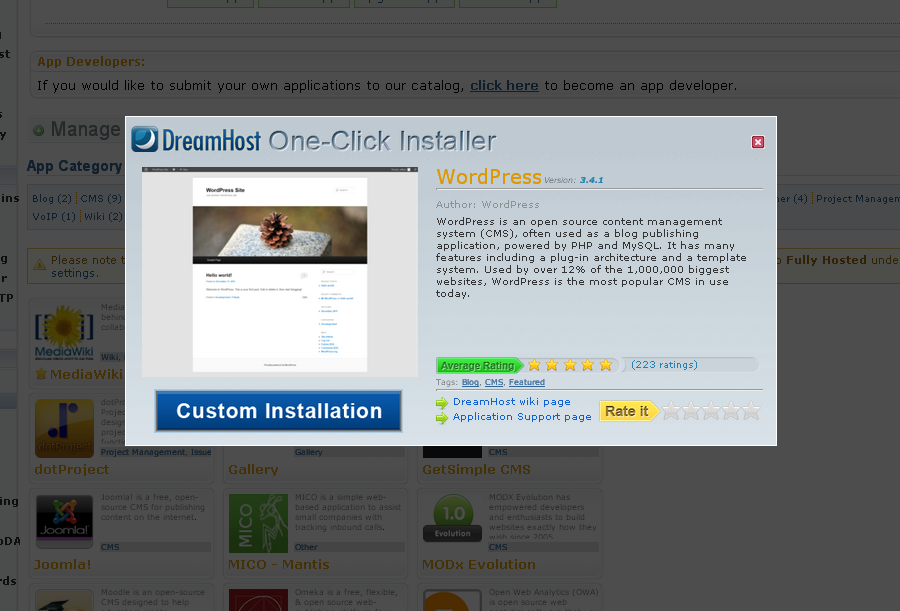
Installing WordPress On DreamHost With Their One Click Installer

I used Blogger for many years but I have now found that WordPress is easier to use and has a more intuitive interface than Blogger.  I kept my Blogger blog going until I was happy with my new WordPress set up and then transferred my blog from Blogger to my website with WordPress installed on it.

This tutorial is for people with an intermediate level of computer skills.  I am only showing you the basic settings here which I used to install WordPress for this blog.'computer' photo (c) 2008, ph0rk - license: http://creativecommons.org/licenses/by-sa/2.0/

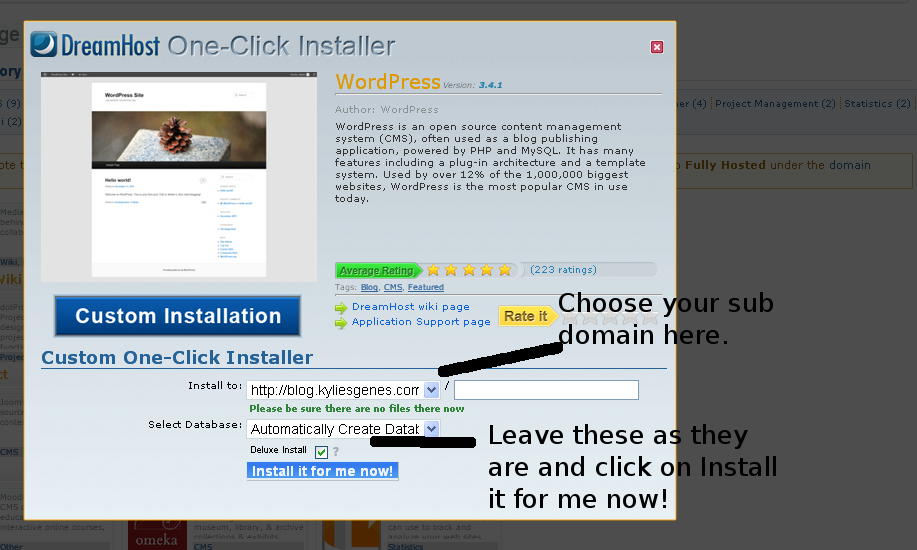
If you choose to have DreamHost host your website then this is how to install the WordPress blogging software using DreamHost’s one click installer.

Once you have signed up for a DreamHost account and registered your chosen domain name you will receive an email from DreamHost with details of how to access your website’s Administration Panel shown below.

screenshot of DreamHost administration panel

Screenshot of DreamHost administration panel


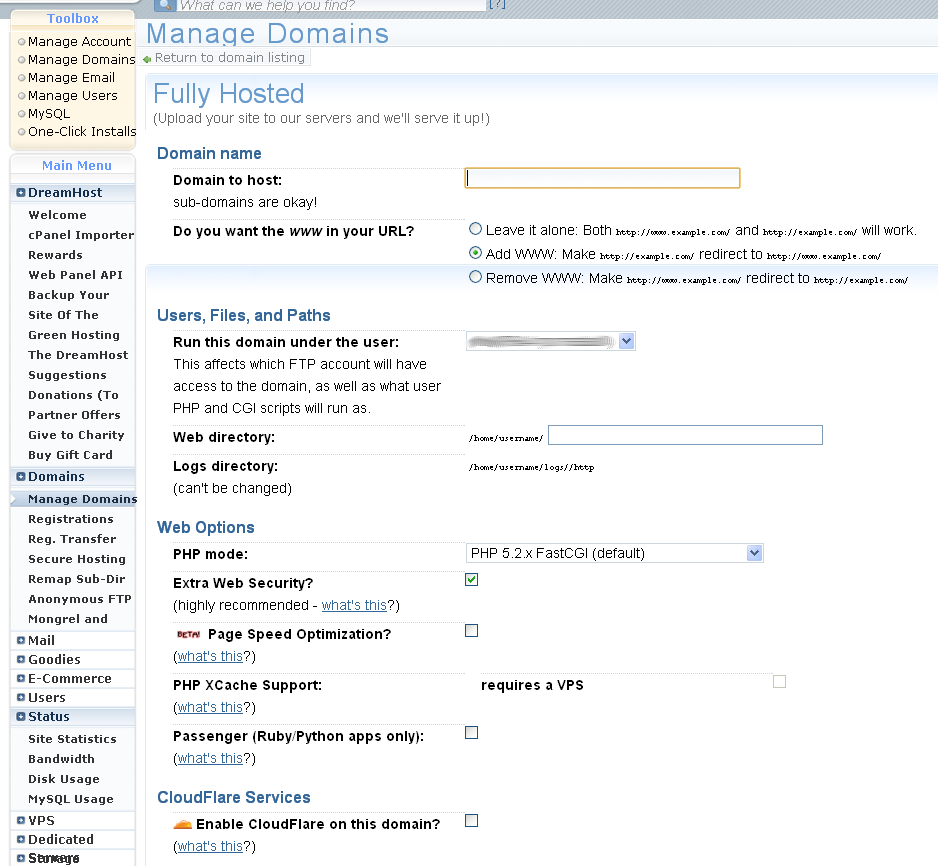
Log in to the administration panel. In the above picture you can see that I have a number of domain names which I’ve blanked out and I’ve just left www.kyliesgenes.com visible. I created a sub domain called www.blog.kyliesgenes.com and this is where I installed the WordPress software. It is a good idea to do this so that you can install other databases or software packages in the top level domain. In the administration panel under Manage Domains where it says Add New Domain/Sub-domain click it.


screenshot of DreamHost create a sub-domain


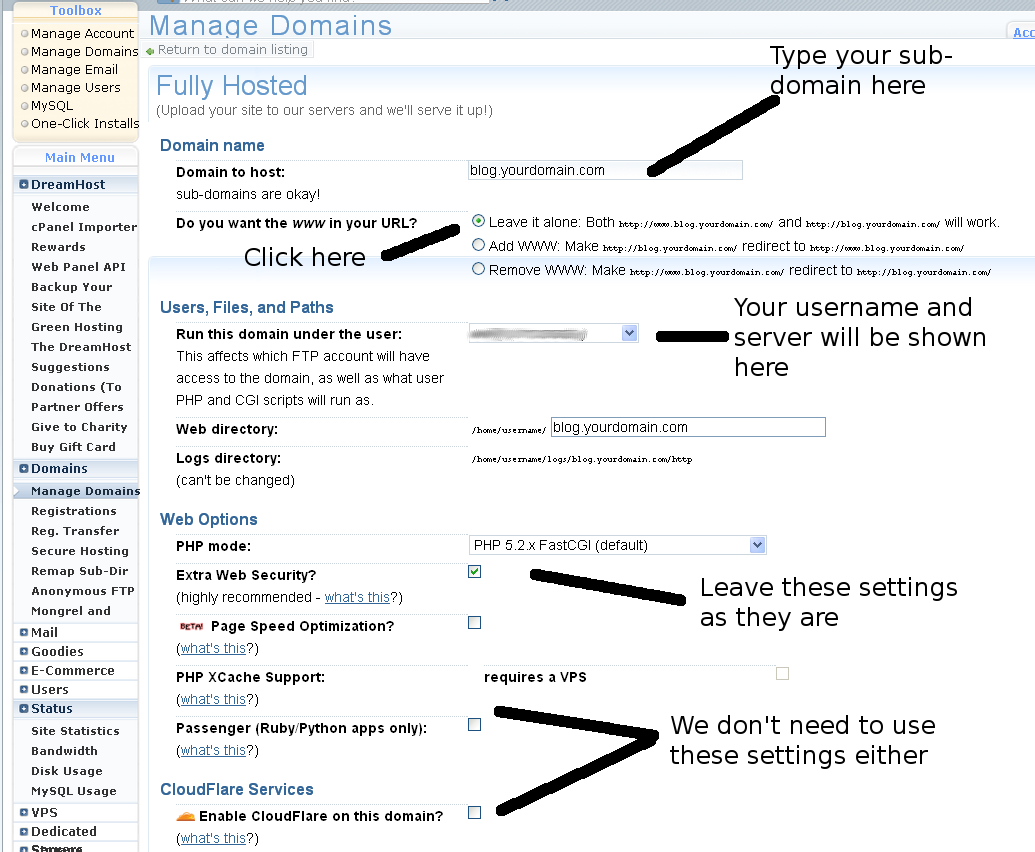
Type in the sub-domain you have chosen. You may like to call it www.blog.yourdomain.com.


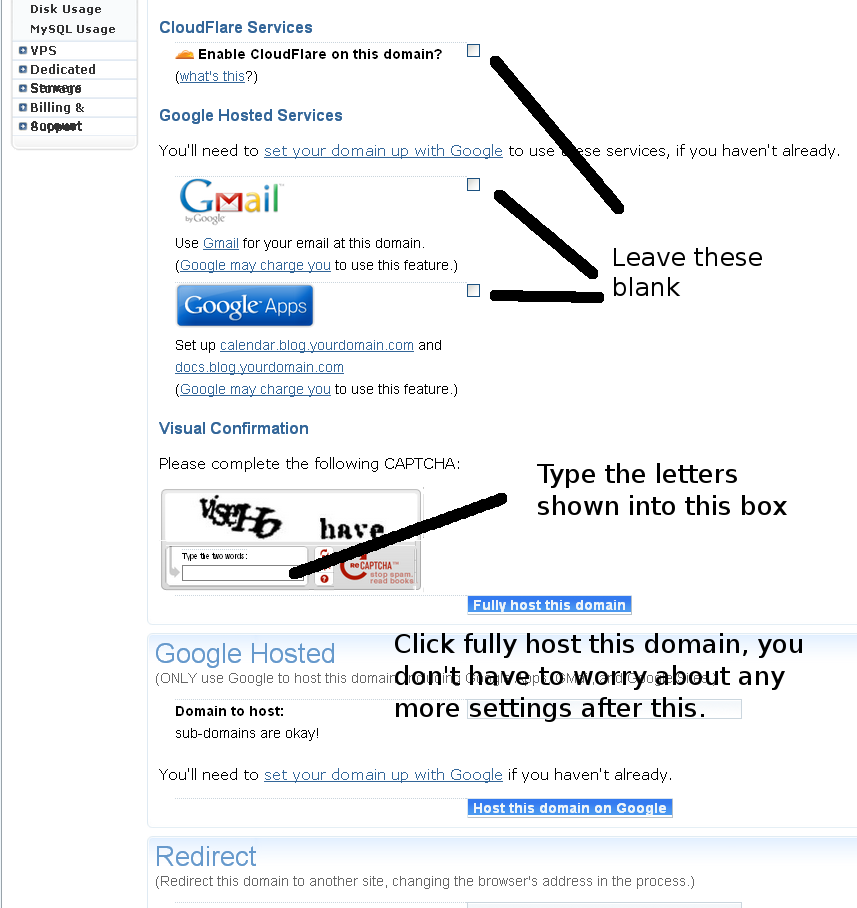
Sub-domain settings

Instructions for setting up a sub domain


There may be some time to wait for these changes to take effect. Once it shows in your DreamHost administration panel that everything is ready to proceed then you can go on to installing WordPress. In the top left hand corner of the screen is the Toolbox, click on One Click Installs.


DreamHost's one click installer


Begin WordPress installation


Choose sub domain


Once WordPress is installed you will receive an email with instructions on how to choose your theme and start blogging.